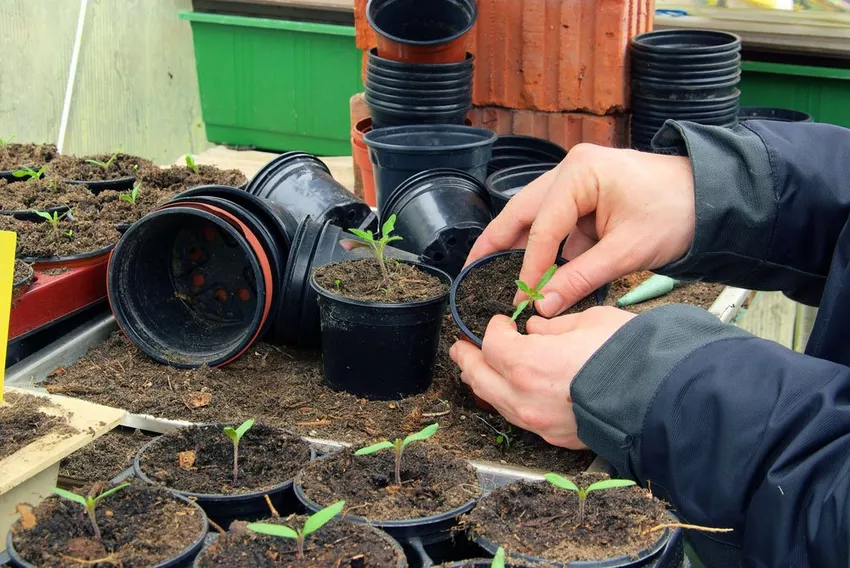
Pricking out tomatoes isn't rocket science. Nevertheless, there are a few things to consider when carrying out the process so that the plants survive the process undamaged.

If you want to plant tomatoes in your garden or on the terrace, you should find out in advance exactly what kind of work you will have to do in this regard. Unfortunately, planting and letting it grow wild is not enough.
Of course, tomatoes need water regularly and they are also happy about a portion of fertilizer. In addition, if you grow the tomatoes yourself, they should be pricked out. The reason is solely that the roots of the plants should grow stronger and denser. In this way you ensure a richer harvest.
What do you need to prick tomatoes?
When is the right time to prick?
The best time to transplant is about 20 to 24 days after sowing. Only then have the first real tomato leaves formed and the plants are mature enough to be transplanted. So when pricking out, just plant your protégés apart and give them more space.
What tools do you need for pricking out?
You should always have the right tools to hand so that you don't injure your plants when transplanting. Above all, it is important to have a tool with which you can get the plants out of the ground undamaged. You can find special pricking aids on the market that make this work a lot easier. If you don't have a prick, a small spoon or fork can help.
You will also need a sharp aseptic knife to trim the roots and a prod to prepare holes in the soil. A thick ballpoint pen without a refill can also be of equal help here.
What soil do the plants need?
Your tomatoes need nutrient-rich soil at the latest when they are repotted. Here you can get special tomato planting soil that is tailored to the needs of tomatoes. But you can also mix soil yourself. To do this, take a third of sieved garden soil and fill it up with compost and fine sand.
Pitting Instructions

❍Step 1: water plants
Before you start transplanting, you should water the tomato plants sufficiently. Give the plant about three hours to fully soak up the water. If the plants have stored enough water, they will survive transplanting without any problems. With dry plants, on the other hand, it can quickly happen that the plants wither.
❍ Step 2: Remove the plant from the seed tray
Now carefully remove your plant from the seed tray. Be careful not to injure your tomato plant. Then remove any unnecessary soil immediately. Watering can cause soil to get stuck between the roots and difficult to get rid of. That's not too bad.
❍ Step 3: Examine plants
Examine the plant closely. The roots should be white and strong. If this is not the case, it may well be that this plant will only grow weakly or will not grow at all. Yellowish-brown roots are an indication that you have overwatered.
❍ Step 4: Cut Roots
Now take the knife and trim the roots to a length of about 2 to 3 centimetres. By pruning, you won't hurt your plants, but stimulate growth.
❍ Step 5: Planting
Fill your seed pots with soil and make a small hollow in the soil using the pricking stick. The hole can be a little larger so that you don't have any problems inserting the plant.
Now insert the plant into the prepared hole just below the cotyledons. The more of the stem is underground, the more roots will form. In addition, the plant then has a better grip.
Now gently press the soil onto the plants. If you gently pull on the plant, it must not slip out again.
❍ Step 6: Get out of the sun
Note:
Tomatoes are sensitive to frost and should only be planted outside after the ice saints.
For the next three days you should place your freshly transplanted plants in a shady spot. Otherwise the small plants would quickly wilt if there was too much sun.
After the 3 days you can slowly get your plants used to the sun again. But even now you should not expose your tomato plants to direct sunlight.
❍ Step 7: Place tomato plants outdoors
After about 20-30 days yours will beTomato plants now ready to be planted outdoors. Now you can take them out of the pot and plant them in the prepared tomato bed or on the terrace. Of course you can also grow tomatoes on the balcony.
In the following video you can see again in detail how to prick tomatoes:

By loading the video, you accept YouTube's privacy policy.
Learn more
Load video
Always Unblock YouTube