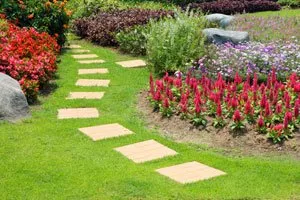
Stepping stones in the garden bring solid ground under one's feet without paving it over. Laying is not difficult, but should be planned carefully.

As long as the sun shines, the world is in order, but if the German weather brings us continuous rain, many a garden owner pads on tiptoe through his green oasis. Lawns are nice, sodden but quite uncomfortable. For this reason, many hobby gardeners decide to lay tread plates. As the name suggests, the stones serve as a firm footing so that you can get to the flower bed, garden shed or terrace without getting your feet wet.
The difference and big advantage to a completely paved path is that you don't "concrete" the garden. Stepping stones provide a solid base, but do not restrict the overall picture. The garden still looks relaxed and mowing the lawn around the stepping stones is no problem either. Once placed, the kick plates should also stay in place. It is therefore important that you do not act blindly.
Laying steps: never without planning!
You shouldn't rush head over heels to the hardware store to make your garden look as neat as it does in our example photo. Think about it and put your ideas on paper. This may sound cumbersome, but it isn't. You don't have to be an artist either, just make a sketch of the garden. Take graph paper and cut out your desired stones. You can now position this on the garden template until it meets your requirements.
Laying the tread plates - step-by-step instructions
Once the planning is complete, you can start. But beware: never lay the tiles loosely on the lawn. As a result, the stepping stones wobble with every performance. There is also a risk of someone tripping over the raised edges and the lawnmower would also get caught on them immediately. Quite apart from that, badly laid stepping stones don't look pretty either.
Step 1: How many footplates do I need?
There is no blanket answer to this questionAnswer, but a simple solution. Walk the path that you want to equip with footplates as normal. Count the steps. Pay attention to a normal gait, do not take strides like a stork, this will falsify the result. Each performance gets its own stone, logical, right?
Extra tip: When buying, don't just look at the look! Tread plates should have a rough surface so that you don't slip on them when they are wet.
Step 2: Put on footplates and test distances
To see what your path will look like in the end, lay the footplates loosely on the lawn. Now you can walk through everything again and change the distances as you like.
Step 3: Prepare the excavation
If all the panels are as desired, the actual laying begins. Use a spade to make a mark around the stones. So you know how big the "hole" has to be that you have to dig afterwards.
Step 4: Work footplates into the floor
Now dig up the earth with a hoe or a spade. How deep you have to go depends on the thickness of your footplates. Make sure that the surface is as level as possible so that nothing wobbles and wobbles later. If the stones are difficult to insert, you can help with a rubber mallet.
Important: If the ground is very soft, it is advisable to add an extra layer of gravel. This ensures that the floor does not sag later and the tread plates become uneven. When you dig it out, you have to add a good 5 cm to it.